NOW FOR SOME ACTION: MODELING AND SLICING
- Obiefuna Obidike
- Apr 17, 2022
- 3 min read


This stage to me is actually what breaths life into the project as it takes a 2D drawing of the model Phone-R-Us requires and turns it into a 3D model that almost makes me feel it.
From the Digital Manufacturing Coursework Post, I had shown the 2D diagram of the phone case given to me by Phone-R-Us to be modeled and mass printed for supply.
For the 3D modeling of this, I made use of the Autodesk Fusion 360 software which I must say was brilliant and made the modelin of this design efficient.
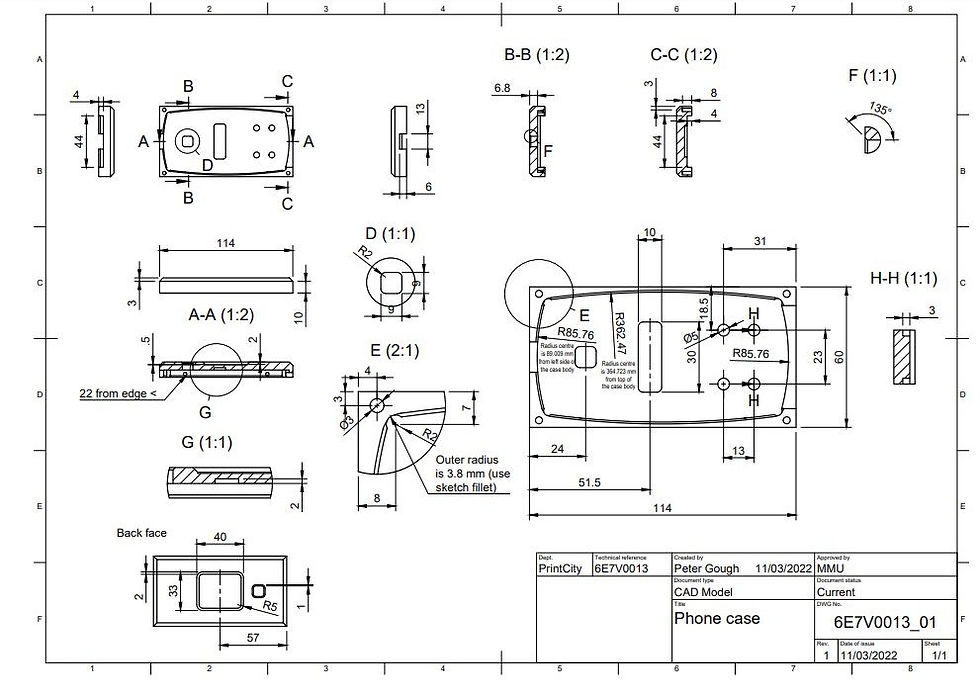
On the 2D drawing, the dimensions of the model were shown. Now all I needed to do was to analyze the design and identify if it can be symmetrical at any point which will enable me to use the "mirror" tool on Fusion 360 to create a whole body from the symmetrical part a tip given to me by Peter Gough.
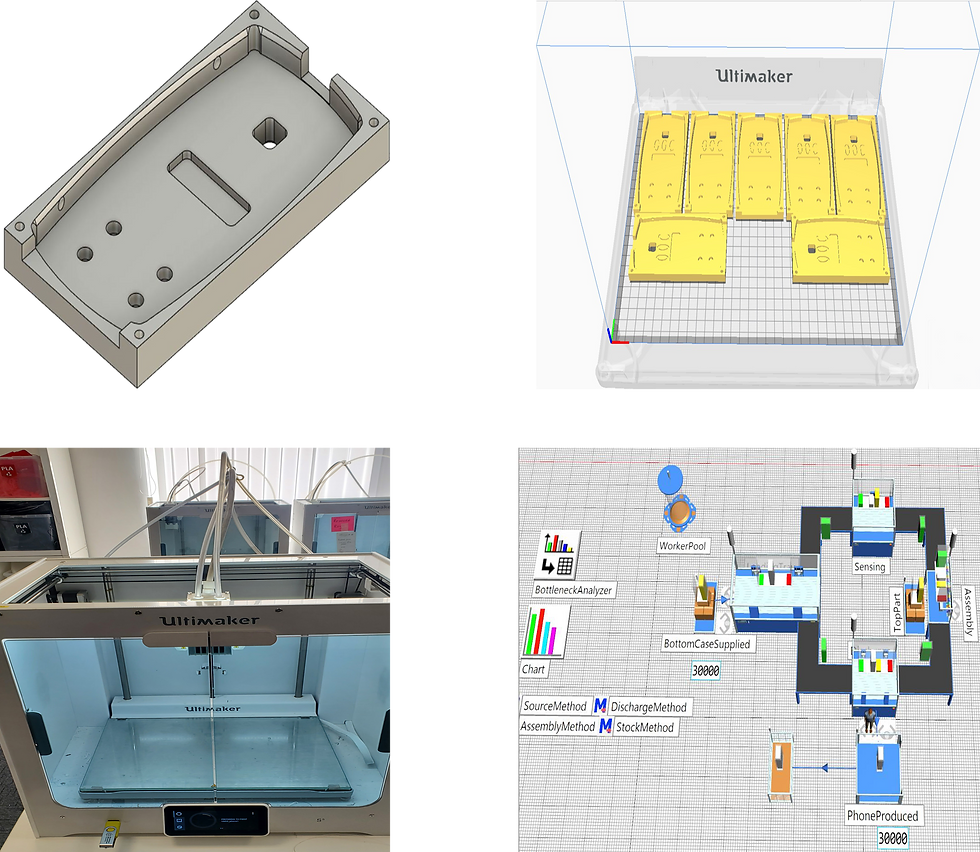
Armed with that knowledge, I was able to vison out asymmetrical quadrant from the 2D design and create a 3D model from it and by mirroring the model twice with the Fusion 360 mirror tool, I formed a "foundationary" base model of the 2D design.
Following a base model, I used the fusion 360 tools in forming the created base into the design as stipulated by the 2D diagram from Phone-R-Us also adding my "OOC" marker to be used in identifying my design.
With the 3D design sorted out, it was time to prep the 3D model for the 3D printers.
For this prepping, I made use of the Cura software which has a vast variety of 3D printers in its arsenal to enable most printing preparation to be carried out in it.
On Cura, I also employed the use of Ultimaker S5 which was available and had an AA0.4 print core for printing material(PLA for this project) and BB0.8 print core for support material (PVA) for this project. with a general print setting of print core temperatures (for the different materials), generate support with print core 2, a skirt adhesion type, and blob primer to ensure the pint core is loaded (which I later found to be a waste as the skirt can replace its function).
Also, I added the market value of both PLA and PVA filament to enable me to estimate just how much my print would cost.


Next, I exported the Cad file of the model 5 times into Cura in an STL format. I know you would be wondering why 5 times. Well, I needed to try out different individual print settings a.k.a. "per model settings" on those exported 5 models.

For the Individual print setting, I set various infill densities, infill patterns and either enabled or disabled the support interface for the models.


The support indicated by the purple layer was what I used to support the hollow indentation of the phone case that is in contact with the bed of the printer. Also, the support material for this product only goes up to a height indicated by level 12 seen on the right-hand side, and by level 13 the print materials take the shape of the support material hence forming the required indentation without deforming.


After Slicing my model to convert it to a printable command, I was given the resulting printing time for the 5-model arranged as above for 7 hours 11 minutes and will consume 121g of PLA valued at £4.11 and 7.7g of PVA valued at £0.46

Do you think the arrangement and settings I used for these print is best? The next post will give us an insight into this.


Comments